Scott McCann, our Technical Account Manager in Hillcrest, wrote an insightful piece on fixing Quick Parts in Microsoft Word after a migration. We hope this blog helps you enable productivity in your business. Quick Parts in Word are great to implement into documents to display data from SharePoint, especially when they’re used in report creation into templated documents. But what happens when you migrated your data to a new SharePoint environment? Well, Quick Parts stop working. While your documents and the associated columns do come across without a problem, all the documents will be blank. “How can that be?! My data is right there” We hear you! Don’t worry, we were in the same predicament and have found a solution. Now, you may have already figured out that each Document needs to be opened and the Quick Parts reconnected. That’s fantastic and works if you have a small number of documents (or a team of a few hundred data capturing monkeys to update 1000’s of Documents). Let’s say you don’t. Let’s say you’re like me and need a way to update 1000’s of documents at once, with very little work. We’re going to achieve this using Microsoft Flow and a new Document Library. There is no quick fix for all the Documents in the current library, but with some Flow magic we can recreate the library and populate all the items from the Source, and get the template displaying data. Let’s get to it: Before we jump into it, this is the Flow we will create: This walkthrough assumes that: 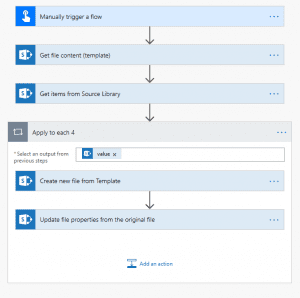 Alright, let’s go. 1. We need to templatise the source Library. Head into the Source library, and into Library Settings. Save the Document Library as a template:
 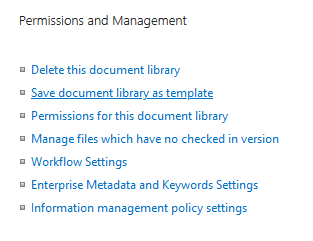 Give it a name and click OK. 2. Now we need to create a new Library based off this template. Go into Cog Wheel->Add an app and find the item you just created in Step 1. Hint: You may need to go to the next page to find it.
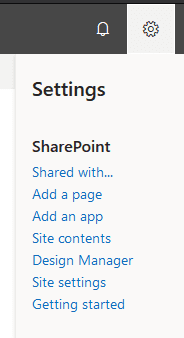
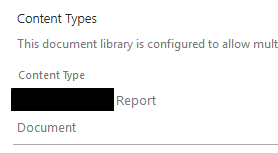
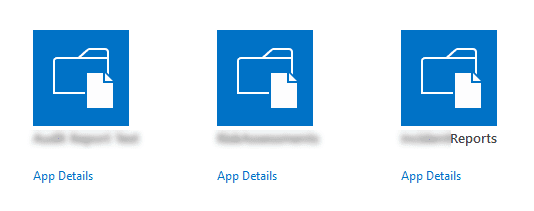 Once found, click on it and give the new Library a name. We’ve now created the new library. Now we must edit the Template document. 3. Head into the new Library, and into Library Settings. Select your Content Type
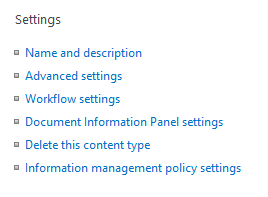
  4. Select Advanced Settings
  5. Here we will see the Document Template. What we need to do is download this template. Click ‘Edit Template’, open it in Word and save it somewhere locally for now. We will upload it in the next step.
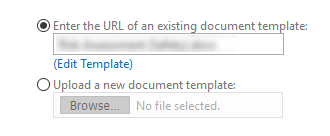
  6. Choose Upload a new Document Template
  Browse for the file you have just downloaded. Add it and select OK. 7. Head back into Advanced Settings and it should display the new template
  8. Select ‘Edit Template’ and open it with Word. From here we will be replacing the Quick Parts one by one. 9. Find a Quick Part and select it. Remember what it is connected to, and then delete it:
  10. In the same place where you just deleted the part, add in the same choice from the Quick Part menu:
 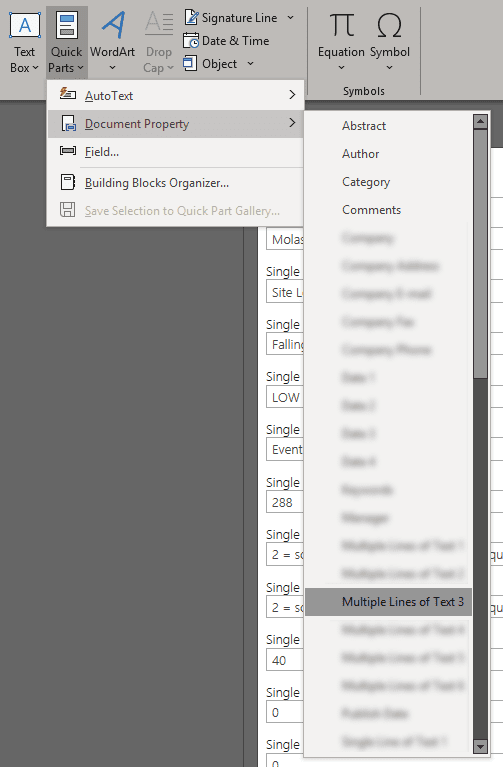 11. The Quick Part will then be displayed on the document and likely be empty.
  12. Do this for all Quick Parts and Save. Our Document is now ready for use. Next, we will build the Flow: 13. Create a brand-new Flow that is set to trigger manually. 14. Flow needs to know what we want to use as the Template, so add in the Get file content action. Enter in your Site Address, then use the Folder icon to browse your Site for the template we created above:
  15. We’ll use the Get Items action next. Hint: We use this action instead of the Get File (Properties) because Get File (Properties) can only get 500 items at most. Get Items can get any number we choose (default is 100): a. Enter in your Site Address b. Select or manually type in the Library name
  c. Hit the Menu button, select Settings
 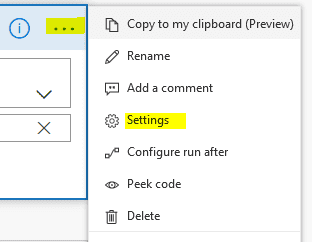 d. Turn Pagination on, and enter in a threshold limit
  16. Next, we need a loop to run against all the items returned, and create a new Document using the new template, and the data from the Source library. Add a new action called Apply to Each. In the Select Output field, use the value from the Get Items. The below steps are condensed into one screenshot after step 18. 17. Add a new action: Create file. This is where we tell Flow to use the template we created. a. Enter in your Site Address b. Enter in your Library (folder path where the file is to be created) c. File Name: this is from Get Items. Remember to add .docx here! d. File Content: Here is where we select the template file. Select File Content from the first action (after the trigger) 18. When the file is created, we need to then go an update the various columns associated to that file. Add the ‘Update File properties’ action: a. Enter in your Site Address b. Select your new Library c. Fill in the various fields, using the data from the ‘Get Items’ action
 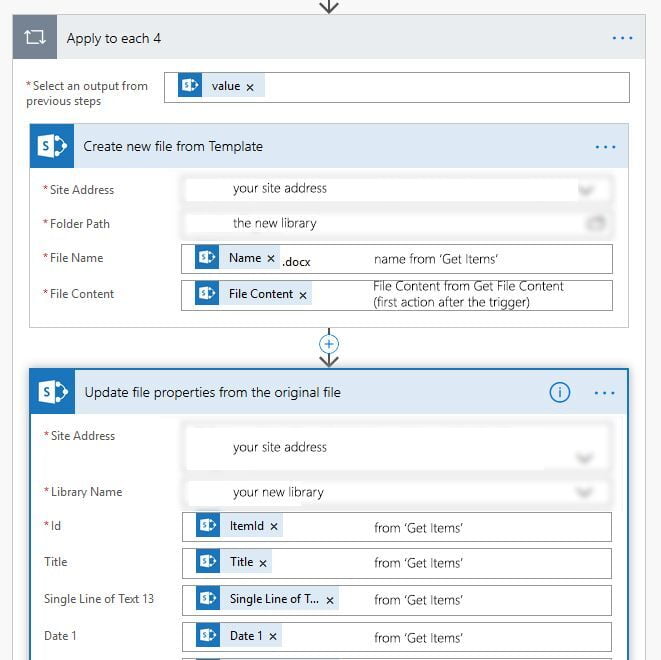 d. Save your Flow and test it! It’s always advisable to run your Flow against 1 item. To do this, under the ‘Get Items’ action in the Filter field, enter in the column that you want to filter on and the value that must be met. Below I will filter on the ID column looking for ID 24. This means that my Flow will return 1 value and run against that. This allows me to test prior to doing all the 1000’s of items. e. Example: ID eq 24 19. When you are happy, run the Flow! Within seconds you will start seeing your library populate with documents, and more importantly, they will open with data!
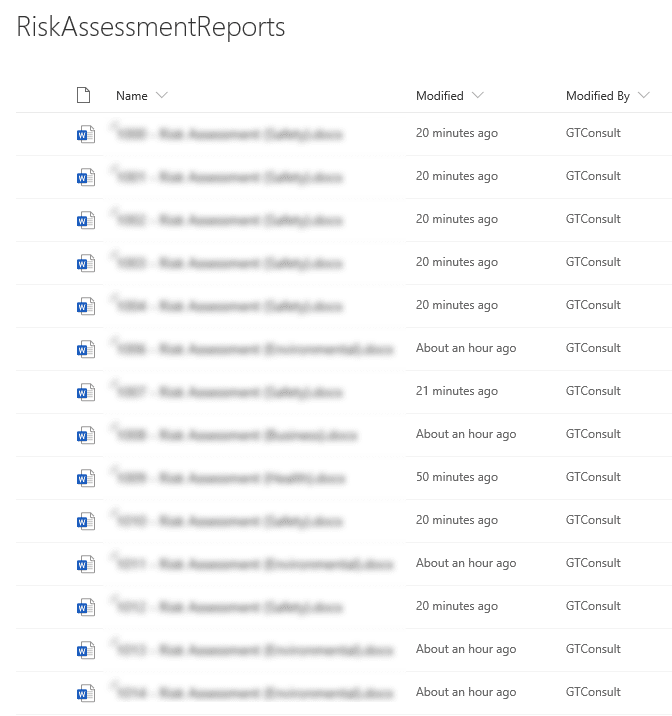
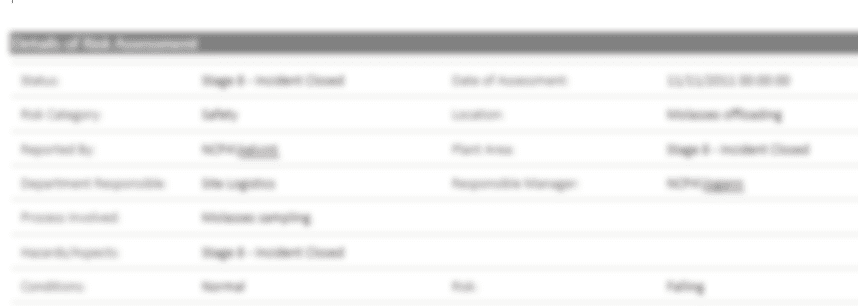 20. Pour yourself a coffee/drink/whatever. You deserve it. We hope this blog helps you enable productivity in your business. And don't forget, our friendly gang of superheroes are here to assist you with your development, support and protection needs.
- You have a template in a Content Type
- You understand the issue and potential fixes
- You know how to work with Flow and the SharePoint Actions
 Alright, let’s go. 1. We need to templatise the source Library. Head into the Source library, and into Library Settings. Save the Document Library as a template:
  Give it a name and click OK. 2. Now we need to create a new Library based off this template. Go into Cog Wheel->Add an app and find the item you just created in Step 1. Hint: You may need to go to the next page to find it.
 Once found, click on it and give the new Library a name. We’ve now created the new library. Now we must edit the Template document. 3. Head into the new Library, and into Library Settings. Select your Content Type
  4. Select Advanced Settings
  5. Here we will see the Document Template. What we need to do is download this template. Click ‘Edit Template’, open it in Word and save it somewhere locally for now. We will upload it in the next step.
  6. Choose Upload a new Document Template
  Browse for the file you have just downloaded. Add it and select OK. 7. Head back into Advanced Settings and it should display the new template
  8. Select ‘Edit Template’ and open it with Word. From here we will be replacing the Quick Parts one by one. 9. Find a Quick Part and select it. Remember what it is connected to, and then delete it:
  10. In the same place where you just deleted the part, add in the same choice from the Quick Part menu:
  11. The Quick Part will then be displayed on the document and likely be empty.
  12. Do this for all Quick Parts and Save. Our Document is now ready for use. Next, we will build the Flow: 13. Create a brand-new Flow that is set to trigger manually. 14. Flow needs to know what we want to use as the Template, so add in the Get file content action. Enter in your Site Address, then use the Folder icon to browse your Site for the template we created above:
  15. We’ll use the Get Items action next. Hint: We use this action instead of the Get File (Properties) because Get File (Properties) can only get 500 items at most. Get Items can get any number we choose (default is 100): a. Enter in your Site Address b. Select or manually type in the Library name
  c. Hit the Menu button, select Settings
  d. Turn Pagination on, and enter in a threshold limit
  16. Next, we need a loop to run against all the items returned, and create a new Document using the new template, and the data from the Source library. Add a new action called Apply to Each. In the Select Output field, use the value from the Get Items. The below steps are condensed into one screenshot after step 18. 17. Add a new action: Create file. This is where we tell Flow to use the template we created. a. Enter in your Site Address b. Enter in your Library (folder path where the file is to be created) c. File Name: this is from Get Items. Remember to add .docx here! d. File Content: Here is where we select the template file. Select File Content from the first action (after the trigger) 18. When the file is created, we need to then go an update the various columns associated to that file. Add the ‘Update File properties’ action: a. Enter in your Site Address b. Select your new Library c. Fill in the various fields, using the data from the ‘Get Items’ action
  d. Save your Flow and test it! It’s always advisable to run your Flow against 1 item. To do this, under the ‘Get Items’ action in the Filter field, enter in the column that you want to filter on and the value that must be met. Below I will filter on the ID column looking for ID 24. This means that my Flow will return 1 value and run against that. This allows me to test prior to doing all the 1000’s of items. e. Example: ID eq 24 19. When you are happy, run the Flow! Within seconds you will start seeing your library populate with documents, and more importantly, they will open with data!
 20. Pour yourself a coffee/drink/whatever. You deserve it. We hope this blog helps you enable productivity in your business. And don't forget, our friendly gang of superheroes are here to assist you with your development, support and protection needs.